Nails of the week: Spotty blue and yellow

blue and yellow spotty nails - somanylovelythings

It had been a while since I had a spotty manicure on. I’ve been meaning to do one for ages, and this week I finally got round to it!

I went for a pastel colours version: blue and yellow. This blue, Oxford from Nails Inc, has been a favourite for a very long time. The yellow came in the same set, and is called Wimbledon.

blue and yellow spotty nails - somanylovelythings

I used my one of my dotting tools to get the dots close to perfect (they never are!). Overall, a very easy mani to do, and very cute.

The polishes apply ok. As they are a bit on the old side, they stained a bit. I used two coats of the blue and three of the yellow.

blue and yellow spotty nails - somanylovelythings

Extra shine was given with the Seche Vite topcoat and durability is always fantastic with Nails Inc polishes!

Rating:

4_star

Nails of the week: Pink and blue marble

pink and blue marble effect nails - somanylovelythings

So I rebelled last time and went for a single colour on my nails (missed it? Read about the bright green nails here), but now I am back to my normal (?) self – and it is marble time again!

I find this easy marble so good; the effort is really small compared with the impact, so I just love it, and need to stop myself from doing it every week (even tops the gradients for “cost x benefit”).pink and blue marble effect nails - somanylovelythings

If you missed, I posted a short tutorial on my last marble nails. For this one I did exactly the same, with a wooden stick, but using the turquoise electric dreams from Collection, the pink sweet tart from Revlon and French white also from Collection, finishing with Seche Vite topcoat.

This was done to go with a dress I am wearing for a wedding, is has got water colour flowers in mainly pink and blue, and I am very pleased with the result – it looks girlie, candy like and the mix of colours is great. I even tried “bigger” movements to create different patterns on the marble effect!!!

pink and blue marble effect nails - somanylovelythings

Rating:

4_star

Nails of the week: green marble with tutorial

Green marble nails

Always wanted to try marbling, but don’t really have time or patience for water marbling – just the thought of it makes me want to cry.

After obsessing over it in Brazil, where my manicurist gave them to me for the first time, I promised myself I would try the wooden stick marble myself – it seemed much more manageable than its water counterpart!

Well, I did, and I am chuffed with it! I woke up one morning obsessed with green (yeah, go figure!) so I used white (Collection 2000 103 French White), jade (Kiko 343) and mint green (Colorclub) to create this marble.

It didn’t tak me too long; I first applied a base coat on all nails and then started the marbling process one by one. It is important that steps 1-5 are done nail by nail, otherwise the bottom layers dry, the polish won’t mix and gaps will appear!

marble_tut

1. Apply a coat of the base colour in the whole nail (I used the jade green)

2. Apply a second coat of the base colour, but this time, apply generously – quite thick; a bit blobby even!

3. Put 3-4 drops of the other colours on it

4. Using a wooden stick or a toothpick, gently swirl it around as you please, creating different patterns and making sure you cover the whole nail

5. Clean the excesses (I use the same wooden stick, clean side)

6. Repeat on every nail

I then applied a topcoat and removed the excess using the wooden stick with cotton wool at the end, dipped in nail polish remover.

I love this. It took me 3 attempts on my thumb to get the hang of it, and the others were plain sailing. Just be careful not to rub the stick to hard and completely remove the polish, leaving gaps!

Application was much more straight forward than I though; and durability was ace – flawless for 7 days!

Rating:

5_star

Nails of the week – metallic green, blue, mauve marble

I told you I was going to have marbling done on my nails again…

This time, I went for a lighter base, Close, a metallic greenish aqua with some gold hints, then my lovely manicurist in Brazil, Irma, added Dancer, the metallic dark blue and Gaia, the metallic mauve, all from Brazilian brand Naty.

green, blue, mauve marble nails

She used the same technique as before (see my previous post), with the wooden stick, and the patterns are really lovely!

I then got my toe nails painted with Gaia – I love it!

Durability was great, and in a few weeks I will try it myself…

nails and toenails, nail polish bottles - somanylovelythings

Rating:

5_star

Nails of the week – pink gradient

pink gradient nails - somanylovelythingsOh, how I love a good gradient. Relatively simple to do (it just requires a bit of patience!), gradients deliver great “value for money”. It is pretty, different and can be done with the cheapest, plainer nail polishes around. Love it.

I am totally in love with this weeks mani – it is girly and sparkly, totally gorgeous (even if I say so myself!)

I used a light pink from Kiko, number 376 candy pink, and a dark pink from Revlon, sweet tart. As usual for my gradient, I painted all nails plain white (Natural Collection nail tip whitener) and sponged the pinks after it was dry.

To finish it off, I applied one coat of the super gorgeous electric lane from Nails Inc, which gave it sparkles and an extra dimension with its holographic goodness.

Application was a bit long. I did the white base, let it dry for most of the day and sponged in the afternoon on a Sunday, it took three rounds of sponging. All together, counting base coats and top coats, I have eight (yes, you read it right!) EIGHT coats of nail polish on! However, durability is ace: I’m on the 8th day, no chips! What annoyed me this time is that there was an awful lot of excess polish under my nails and that was a pain to remove… Having said that, it was well worth it!

pink gradient nails - somanylovelythings

You will certainly see more gradients coming soon… watch this space!

Rating:

5_star

Nails of the week – antique gold

nails in antique gold from somanylovelythingsAntique gold. Well, not quite. I called it like that because I cannot think what colour this is. Weird.

This Gosh Galaxy promised a lot from the bottle – a sort of  antique gold base with some colour shifting between blues and pinks. However, it didn’t delivery upon application.

The colour is intriguing; you can spot the antique gold base and the multicoloured flecks. If you look really carefully, in some lighting, there is a very subtle colour shifting. Sadly, not enough to wow me.

I added a pretty star from Nail Art UK, but not even that could save this mani. A waste of two stars, really…

Polish application was fiddly, one coat is very sheer, I have three on. it doesn’t dry too quickly, so the next coat was a bit gloopy. It seemed to get quite thick quickly. Durability is ok.

Overall, the colour is pretty; I like the base colour, I like the flecks but the fact it was beautifully colour-shifting in the bottle really let me down.

As I wasn’t super happy with it, I slapped Barry M croc black effect on it after a couple days, leaving only the star finger as it was, creating an accent nail, which made the mani more interesting. The crocodile skin effect is cute, very delicate and the texture is not too bad. I could still see some gleaming flecks from galaxy through it. But I encountered the same problem with this as I found with crackle topcoats: the durability is appalling – it flakes away very quickly. Plus, as I applied a couple days after I had my nails done, it wasn’t the prettiest finish, you can see a few untidy bits around the cuticle, it was really hard to clean the excess!

Rating:

3_star

Nails of the week – silver glitter, black and nail sticker

silver nails with black tips and nail tattoos

click to enlarge

I am in love with this week’s manicure! Glitter is one of my guilty pleasures – I love sparkly things, especially on my nails, even though it is a major pain to get it off.

This week, I am wearing Barry M in Silver multi-glitter, a fine, silver based glitter with lots of other colours – red, blue, pink, a bit of gold. Really really pretty. Actually, Barry M’s glitter polishes are really amazing, at a great value! This particular one is very saturated, two coats were enough to achieve a good coverage. I ended up using three, but could’ve done with only two.

With Barry M in plain black, a staple in my mani box, I created the diagonal tip, using  normal sticky tape.

To finish it off and give it that extra cuteness, I added a SkinArt UK’s bow nail tattoo on each of my ring finger nails to create an accent nail. The tattoos come in a pack of 60 individual stickers with varied designs – bows, stars, hearts, birds, crosses, anchors – all very pretty and you shall be seeing more of it very soon! I found application easy enough; it is quite delicate, as it is a small sticker, but I applied quickly without a problem, with the aid of tweezers. A good topcoat (I use Seche Vite) is a must after you apply the sticker, and also to smooth the diagonal french tip.

Durability was great, full week with no chips, sticker in place! But above all, how pretty is that?

Rating:

Nails of the week – silver holographic nail foils

To make up for the short life of my bead manicure, I had to choose another half-life, or occasion manicure: nail foils.

I love nail foils. They deliver an amazing effect. Truly stunning. But they do last three days. As a busy person, I think a good manicure is made to last at least seven days in a good state. On occasions, I do compromise this conviction for prettiness. Yes. Guilty as charged.

So, after I lost my beads, I decided to fill up the week with these amazing foils from Minx. They have the most amazing selection of designs. I bought I couple over Olympia Beauty a couple months ago.

They were quite easy to apply – just heat with hair dryer, peel and apply on nail, smoothing it, cutting the excess at top and filing to finish. They are extremely thin and sticky, a great sign. But if you make a mistake, like a crease, and have to peel it back to re-apply, you can see the texture of the foils changes, so ideally, do it once. I didn’t manage to do it in one go on all nails, so there were a couple imperfections, but nothing too blatant.

The effect was absolutely stunning. I mean, breath-taking. The rainbow colour shift this silver foil gives is something I never ever saw before.

And it lasted three days, bang on my expectations. So yes, would do again, it would be great it lasted as much people say they could (a week? hahahaha),  but truth is, after three days it looks a bit manky, with jagged edges…. a shame, but well worth it!

Rating:

Nails of the week- purple with multicoloured foil

Yes, I have been totally MIA. I have the best excuse for it though; I was on holidays!!! Yay! Well, not so much yay as I am back. Boyfriend and I spend 11 amazing days in the US – New York, Chicago, northern Michigan, plus a quick dash over the border to Canada, to Toronto and Niagara Falls.

So I had to wisely choose holiday nails, which would look pretty on my holiday snaps and to last me a week until I had to change it for the wedding I attended. I knew I was going to wear red for the nuptials, as I was wearing the prettiest yellow dress, so decided to go purple before that.

I bought an unbelievably bargainous ColorClub set from TKMaxx, I mean, £7.99 for six polishes and a topcoat. Amazing. I bought the Alter Ego”Keep it under cover” set, with lovely berry shades.

I recently discovered the foils sheets; so ordered five varieties from eBay, plus glue; and I had been looking forward to using it, as the effects I saw were very pretty!

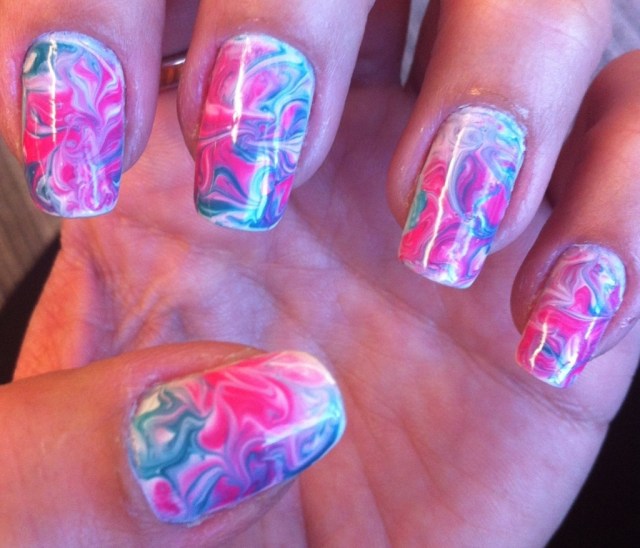
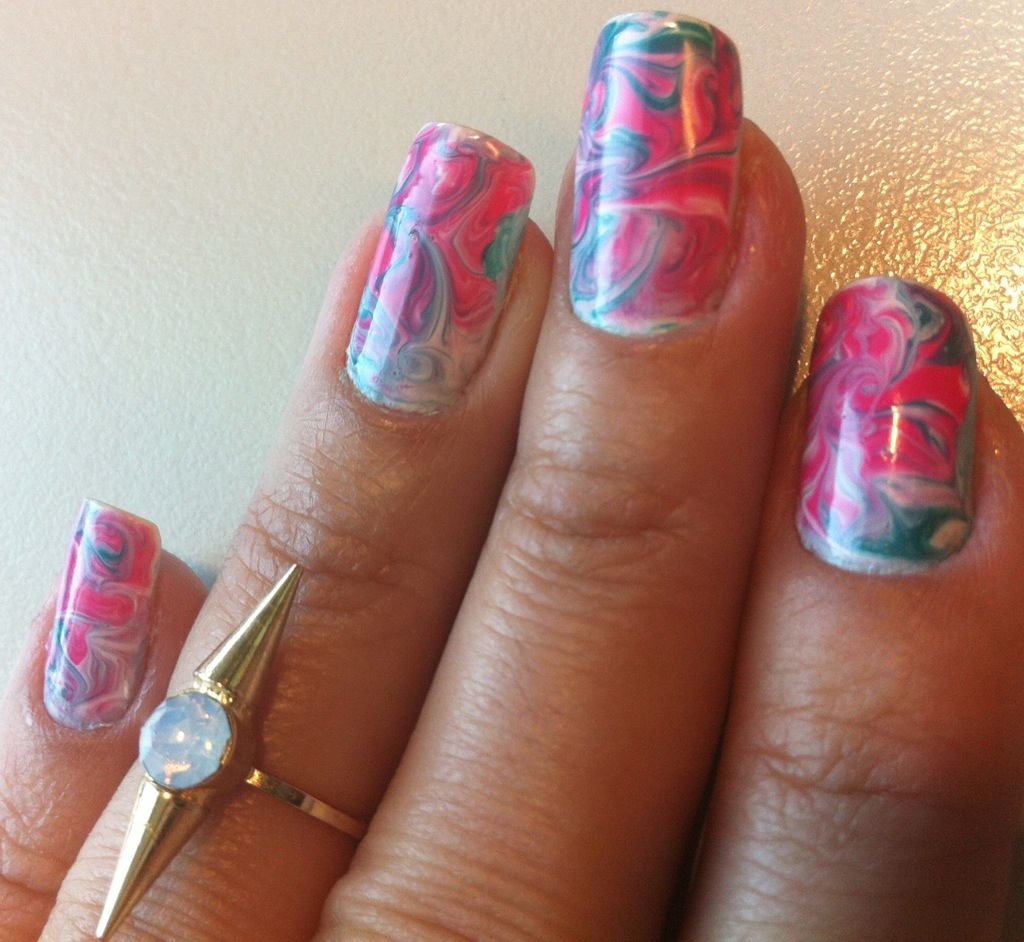
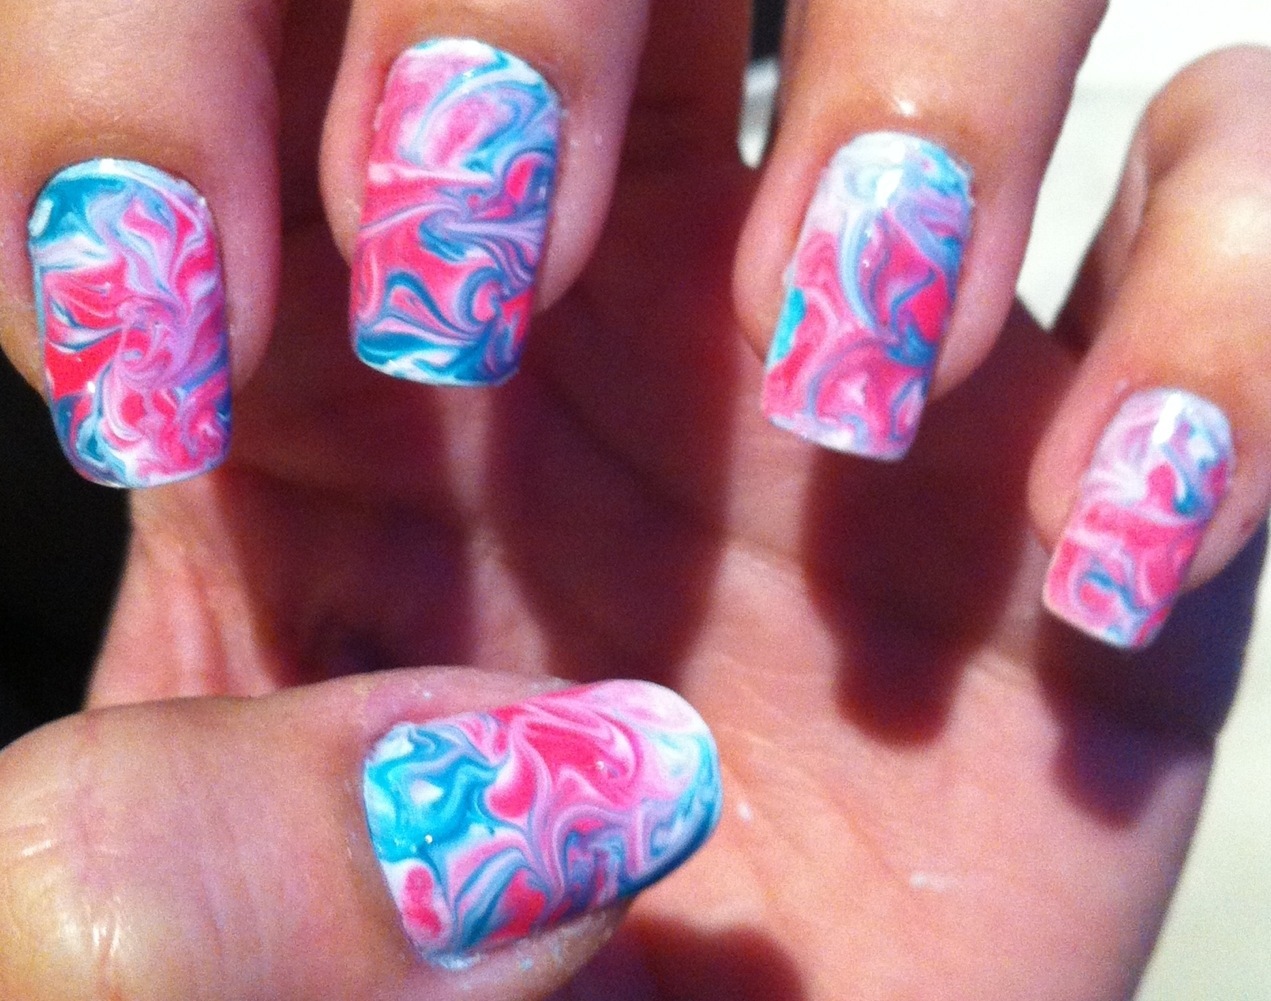
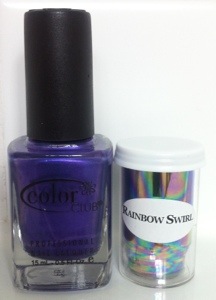
My choice was the ColorClub Secret Agent as a base and after it dried I applied the glue with irregular strokes, let it dry until I couldn’t see it anymore and pressed the foil sheet rainbow Swirl, a pretty silver base with blue, green, pink, lilac and yellow swirls, on to the nail. The colour transfered nicely, and it was pretty easy to do; I applied a bit more glue where I thought there were gaps or I hadn’t applied enough first time around and repeated the process. I then applied a topcoat.

The result was fantastic. I was delighted with it. Pretty, very pretty and quite different.

20120827-143201.jpg

Now, the durability wasn’t the best. Whereas the polish was great, after a few days the foils started to rub off, especially on my index finger… bits of it were coming off, and even though it wasn’t a massive problem, as the base colour was still going strong, it lost a bit of its appeal.

Still, I am certainly going to do it again (actually, I have already, as I had a plain red manicure for the wedding, and removed it a couple days ago to replace with a new foil effect one!).

Rating:

for the prettiness

Nails of the week – cold tones and silver glitter

A pretty pale mint green dress with silver sequins from Lipsy was my choice to attend a wedding, and I thought I would give myself a manicure to match.

I first thought of contrast, but then decided to go with several cold colours and a sprinkle of glitter to glam it up!

Most of the nail polishes I used are from Nails Inc;  the lilac (Cambridge), the blue (Oxford) and the lime (Wimbledon). The green is Anna Hickmann in Vibe and the pale mint green (which is a perfect match for my dress) is H&M in Pear  Ice cream.

Have to say that for being creamy colours, all of them were easy to apply and two coats were enough for the a solid finish. I had tried the blue and both greens before, and they didn’t disappoint. The lilac one bubbled a bit, that was annoying; but as it was in the corner of the nail, it didn’t bother me as much as it would normally.

The lime colour is stunning; I must wear it again soon,alone, need to come up with something interesting to use in more extensively!

Then I applied the glitter puff – I am in love with them! This time I used the silver again, but not on the tips but near the cuticles, as I used the gold a couple of weeks back. I am having to hold myself now to buy a bigger set from eBay, damn, they can glam up any manicure!

Rating: