T his post goes to fulfill a request on how to create wearable smokey eyes. Actually, I owed this to a couple people before the request, so it has been a long time coming! I use smokey eyes all the time, what changes is the intensity and, of course, colour palette. Most of my eye make up challenge looks are smokey.
These two looks are very simple, easy smokey eye looks. The brown and gold is great for paler complexions and day wear, as black can sometimes be a bit harsh, although, in my opinion, nothing beats black for smokey.
If you are paler, make sure you sweep a lighter colour on the lid before start smoking the black, or use grey or matte brown, building up to an almost black colour!
When I go out with smokey black eyes, I usually go much bigger and intenser than this.  But if you never wore smokey eyes, this is a good start – maybe with the golden brown then into the black, to perhaps a much deeper coloured look.
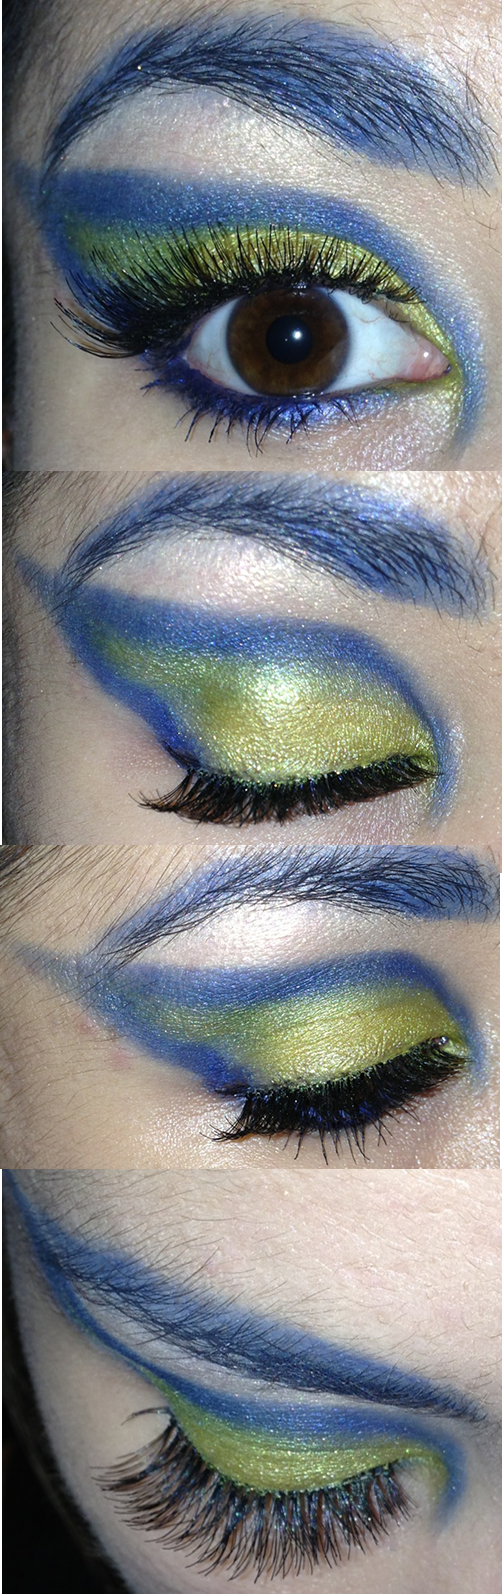
On the right are the finished results, go down for the step by step.
For a basic look, three shades will suffice – a lighter for highlighting, a medium for base and a dark one for smoking – it is very important they complement each other.
Brown

This is very warm and suitable to most skin and eye colours. GOld is a great ally when drawing attention to your peepers!
1. Use a primer. This will help intensify the colour and fix the eye shadow. I apply mine with my fingers, over the whole lid all the way to the brow bone.
2. Using an eye shader brush, apply the lighter colour close to the eyebrows and all across the brow bone.
3. Also apply lighter shade to the inner corner of the sweeping towards the middle, but not too much, still with the eye shader brush
4. With the same brush, apply the medium colour across the whole eye lid. I like getting in the crease, but not above, with this shade too.
5. Apply the darker shade in the outer corner of the eye using a blending brush. This brush is a great investment, as it is makes blending much easier.
6 and 7. Then press lightly in into the crease, following its natural hollow to around halfway of the eye, repeat the movement, adding more eyeshadow until you reach the desired colour – more for more intense. When you get in the crease, this creates the smoking on the inner part, but also above the crease. Keep blending, adding some colour closer to the lash line, always pulling from the outside in, so the colour fades towards the inner corner.
8. Line the bottom waterline with a black eye liner and with a small shader brush (shown), add the dark brown eye shadow to the bottom lash line, blending with the eye liner.
9. Still using the small shader, line the outer corner of the upper lash line with black, and blend up to 1/3 of it. Then continue with the dark brown.
10.Using a pencil brush, add the dark brown to the crease, to intensify the colour.
Apply mascara generously and you are ready to go. After you get more practice doing this, it usually doesn’t take more than 10 minutes!
Black – a bit more intense!
This is a colder, and very light black smokey eye; I blended enough to make it a bit less harsh and quite grey, especially with flash.

1. Always use a primer. Then, using an eye shader brush, apply the lighter colour close to the eyebrows and all across the brow bone. With the same brush, apply the medium colour across the whole eye lid, from the inner corner. When you get to the outer corner, it should be much less intense.
2. Get smoking! With the blending brush, apply the darker shade in the outer corner of the eye. Blend towards the inner corner, as in this case, you want the black to be across the whole eye lid, looking greyer in the middle and with less intensity on the inner corner.
3. Then press it lightly into the crease, following its natural hollow to around halfway of the eye, repeat the movement, adding more eyeshadow until you reach the desired colour – more for more intense, always blending to avoid harsh lines. Keep blending, adding some colour closer to the lash line, always pulling from the outside in, so the colour fades towards the inner corner.
4. Line the bottom waterline with a black eye liner and using the small shader brush, apply black eye shadow to the lower lash line, blending well.
5. and 6. Apply a liquid, gel with brush or pen (which is the easiest to work with!) to the upper lash line, creating a flick at the outer corner. The flick should always follow the natural line from the bottom lashes, creating and imaginary line at 90 degrees in the corner of your eyes, as if it was going to your temples.
I also used the pencil brush to intensify the black at the crease, then smoothing with the blending brush. I finalised it with lashings of mascara – if you want more dramatic, you can also smoke above the crease, in the outer corner towards the eyebrow, but not too much – always apply more of the lighter colour to the brow bone and blend downwards if you go too far. False eyelashes go very well with smokey eyes, and are great for glamming out the look!
Also, black eye shadow tends to drop when applying, so if going for the look, do the eyes first, then do the foundation afterwards. I also use a good concealer under the eyes after doing my black smokey eyes, to guarantee it wont look like dark circles!
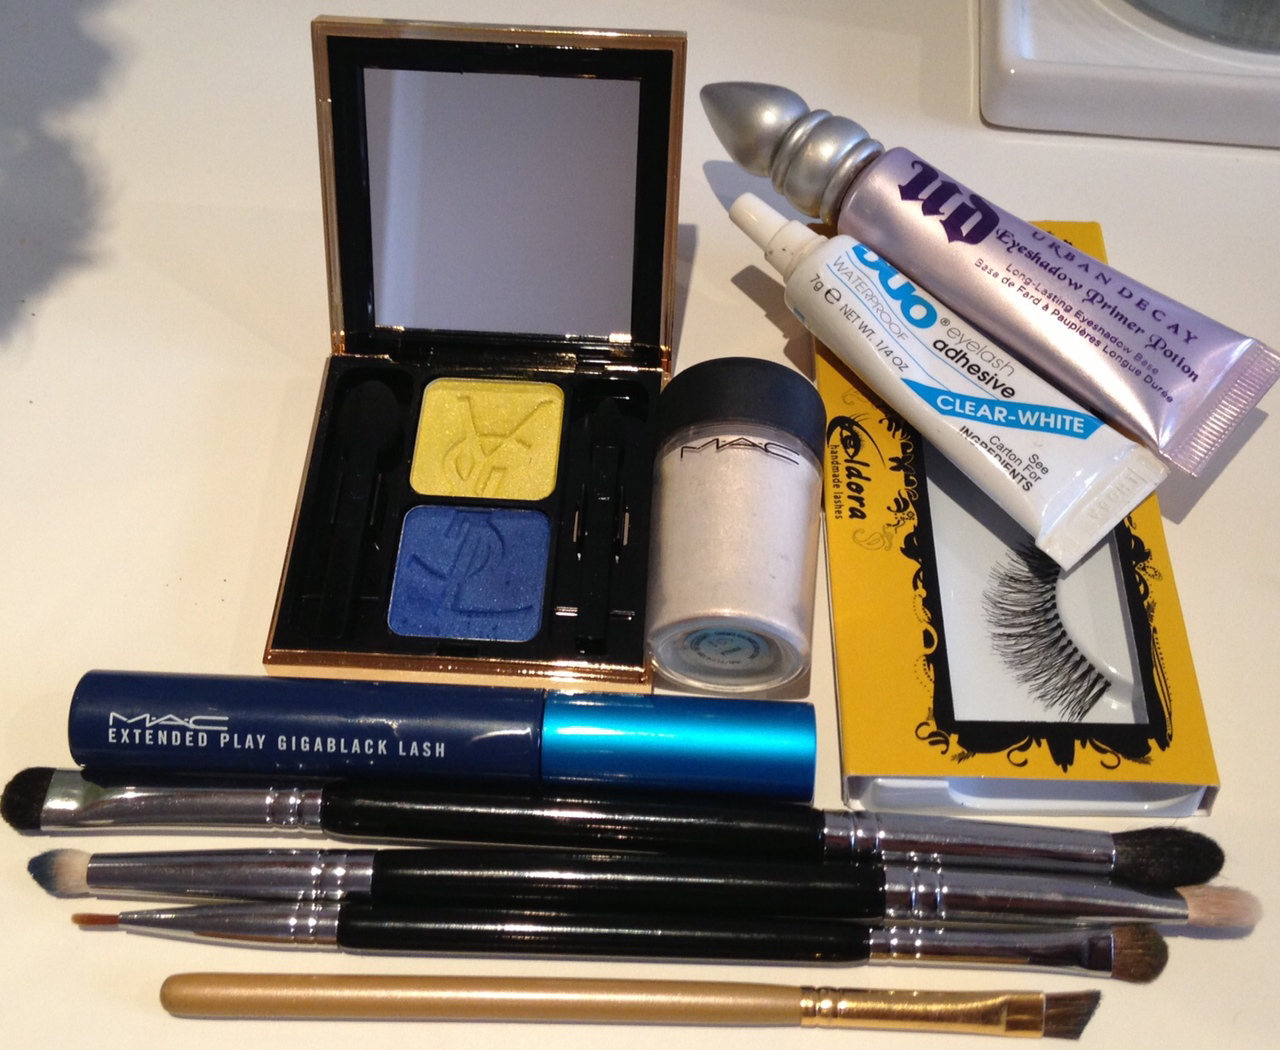
Products I used:
Eye shadow – Both looks were created using the Urban Decay Naked 2 palette. It may seem costly, but you get a great selection fo colours that are for everyday use, but you can build up for a night look. And it comes with a double ended brush – eye shader and blending in one! For the brown look I used Bootycall, Half Baked and Busted. For the black, I used Verve, Pistol and Blackout. I find that almost any eyeshadow is alright if used with a good primer – but high pigmentation is very important.
Primer – Urban Decay Eyeshadow Primer Potion, the best eye primer I ever used. Check review here.
Brushes – all good investments:
- Eye shader brush, from Naked 2 palette, but I also have MAC 239.
- Blending brush, from Naked 2 palette, but I also use MAC 217.
- Pencil brush, MAC 219
- Concealer brush, MAC 194 (not needed, you can apply concealer with you fingertips!)
Black eye liner – MAC eye kohl in Smoulder and Collection 2000 Extreme 24 hour felt tip liner.
Mascara – any you have. At the moment I am trying Hourglass’s Film Noir in Onyx. Apply more to the outer corner, to give it a flutter! Curl and if you want, apply false eyelashes to be more dramatic!


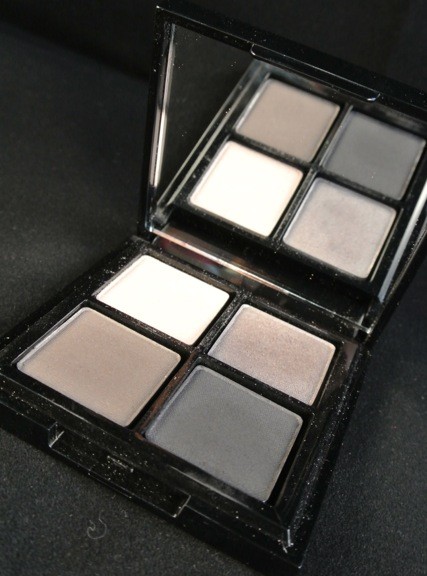
 This palette comes with five very wearable shades: a very pearly pink, a light silver grey, a metallic charcoal, a very dark charcoal with silver particles and a satin pure black. What a selection!
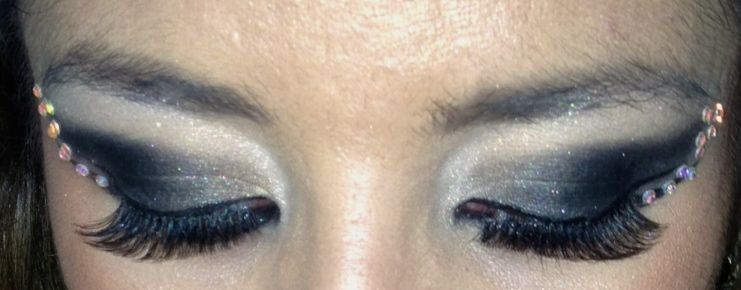 Application was alright, the colours are super pigmented and look great when applied. You can also use them wet for extra impact. Dry they are extremely blendable. The only problem I found with it is that the darker colours drop an awful lot when applying, so if going bold, do eyes first then skin. Or hang tight to tissue under the eye. Once it drops, it really sticks.
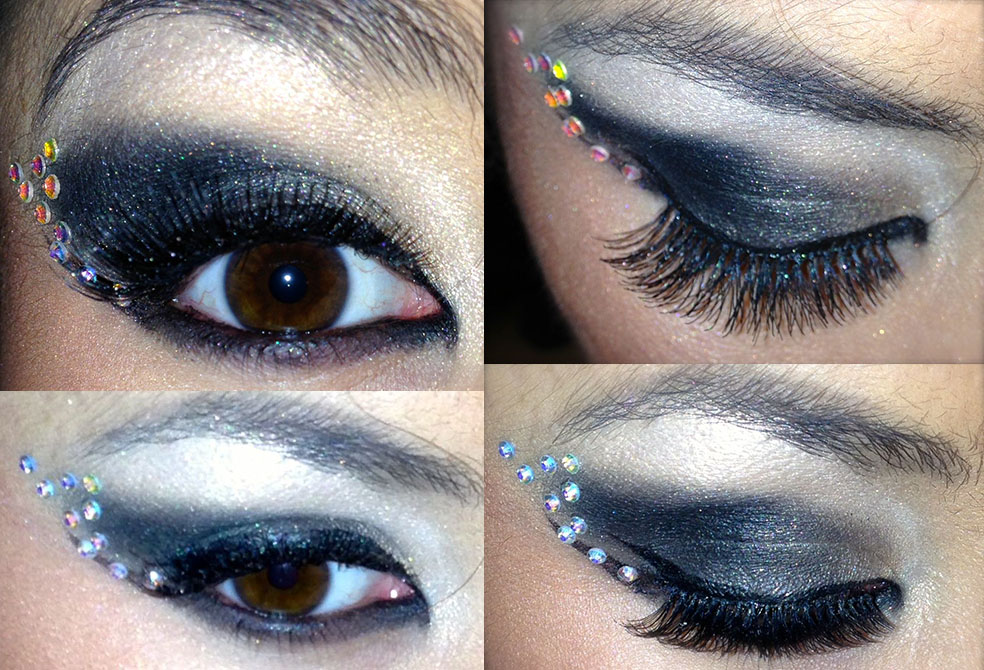

 It dries pretty quickly and feels great on the skin. I was worried it was going to pull after it dried, but it didn’t; I couldn’t even notice it was there. I filled the gap between my lash line and the tattoo with black and gold liner to complement the look.