Product review: Sienna X gradual tan lotion

Finally I got round to trying gradual tan lotion I was given by the lovely Nicky from Sienna X over at Olympia Beauty exhibition. This will make a long-ish review, as there were quite a few products to try!

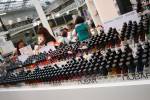
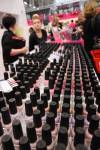
Sienna X was in the media cloud area, and I was very excited to stop by, have a chat about the company and get hold of great products.

The company was born out of Nicola Matthews ingenious tanning cubicle idea, and evolved into a brand that provides salons with professional tanning supplies as well as helping with education, marketing and business support to salons and mobile therapists. Add to that tanning provided to huge TV shows (Strictly), fashion shows (London Fashion Week – Holly Fulton), glossy mags coverage and celebrities fan and you have a winning formula.

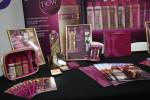
However, what really makes it and matters, for me is the product. I received a full size gradual tan lotion, as well as a sample of their Try me, Tan me kit in a pretty bag containing a Polishing Scrub, Dark Glowing self tan (which will also come with latex gloves!), Radiance Body Balm, and Silver Shimmer (when you buy a berry bag) or Gold Shimmer (when you buy a gold bag).

All the products I tried are paraben and cruelty free, have natural ingredients and some have anti cellulite and anti-ageing formulations. Instead of the Dark Glowing self tan, I decided to try the gradual tan sample only.

The packaging is very nice, with a lock pump, sturdy and easy to use, especially when you have your hands full of products. The lines are simple and modern, the colour scheme very pleasant to the eyes with good contrast – fuchsia/pink and gold, of course!

To prepare for the tan, I exfoliated my skin with the polishing scrub, which contains fine pumice, ginger and a lovely lemongrass smell (which is present across most products I tried).

After rinsing it off and drying my skin, I applied the gradual glowing self-tan lotion, which has aloe vera, almond old and cocoa butter AND the anti-cellulite formula! The cream is not too thick and spreads really well, so it is easy to rub thoroughly on the skin.  The colour develops in 6-8 hours. I applied at night and could not wait to see the result in the morning.

Finally, I applied the radiance body balm all over my body – this contains almond oil, shea butter and vitamin E, has a very nice consistency and also spreads well, being absorbed quickly by the skin and leaving a subtle cocoa smell, which I love. This, after the self tanning lotion, is my favourite product from the samples I got.

I woke up to a sun-kissed skin, much richer than I thought I would after only one application. The colour is a lovely light shade of gold, not too orange for my skin tone. There were no streaks, which is fantastic;  in the past, I always went for sprays and mixed with moisturiser, to avoid streaks!!!. My skin was also soft and feeling moisturised. My palms, being washed as instructed, had no stains! Bonus!

When I got to work, I also noticed that the radiance balm had left very subtle shimmery flecks all over my body, and the over all effect was a nice sheen – I wasn’t sparkly! The following day I washed my body with the Balance body wash, with silk protein, ginger and lemongrass, which is meant to help to prolong your tan.

The proof is in the nose (yeah, you heard it!)

So, the whole line and the tanning product are ace right? Wait for this, it gets better. When Nicky offered me the lotion for review, she asked what was my problem, if any, with tanning products. I said, without thinking twice, “the smell”, to which she replied “we got an award for best smelling tanning product”. That got me excited, despite being quite sceptical. I have tried many tanning products over the year, even though this is the first I review, and the smell really, really gets to me.

Well, I ate my words. This products smell is much, much, much better than anything I tried before. I am not going to say there is not even a tiny sign of that “biscuit” smell that exhales from your body after self tanning application. There was, but it was almost imperceptible. At no point during the day I caught a sniff of it. NOT A SNIFF. Amazing!

So I am sold. I am soooo glad Nicky gave me a full size bottle if the Gradual self tan! This is my favourite  self tanning lotion and I shall keep using it – more than vanity, it is a need, just because I am from a tropical country, and I don not recognise myself in the colour I turn into in this country!

For more information on these products and others from Sienna X, visit their website. They also offer free delivery in the UK!

I was offered the products to review by Sienna X. The review is based on my own true experience with the products and reflects my opinion on it.

Lanvin and Ladurée – tasty fashion

A delicious, fashionable and very French collaboration: Lanvin’s creative director Alber Elvaz designs stylish boxes for Ladurée.

The uber cute box, which has sketches of fashionistas faces and a pretty red bow, can take eight scrumptious macarons, including the four flavours created especially for the occasion, all bubble gum flavour based, described by Elbaz as “the bubble of childhood”.

Although limited edition flavours are available to go with the box, you can make your own selection to include traditional flavours – I love macarons, so I succumbed to eight different varieties, and of course, wasn’t disappointed with any of them!

According to the traditional  and prestigious French sweets Maison, Elbaz  “not only make women beautiful but also proves that sweets and beauty can go hand in hand.”

Gorgeous. And yummy!!!

Eye make-up look challenge – black liner

After the super indulgent green witch eyes, I went for something a bit “simpler”. Still, I love the impact of the under the eye liner. It doesn’t pop out as much as I thought it would, so is more wearable then I expected…and simpler to achieve!

After priming, I swept a metallic beige all over my lid up to my brow bone. I then applied a metallic light brown from the inner corner  following the crease, just up to where my eyebrows start, blending with the lighter colour.

Using a felt tip eye liner, I lined my upper lash line, pulling it from outside the inner corner, and finished with a flick. On the lower lash line, I used a white eye liner, from about 2/3 of the way towards the outer corner. I then created a white flick, slightly smaller than the black one from the upper lash line.

I followed with crushed pigment from about 1/3 from the inner corner to the outer corner.

Finally, I drew the line parallel to my lower lash line, following my eye shape and flicking it downwards towards the inner corner. I blended some crushed pigment in the centre of the upper lid and finished it off with false eyelashes.

Products I used:

  • Urban Decay eye shadows in Midnight Cowgirl and Midnight Rodeo
  • MAC crushed pigment in White As Snow
  • Studio eye liner in Winter white
  • Collection 2000 Extreme felt tip eye liner
  • Eylure lashes number 155
  • Duo eyelash glue
  • Urban Decay eye primer
  • MAC brushes 239, 231, 208
  • Maybelline Falsies mascara

Difficulty:

Nail of the week – gold with black chevrons

Experimenting. This has been my mood. When I bought the gorgeous OPI GoldenEye, part of their James Bond Skyfall collection, I was quite happy to wear it on its own, as it is show-stopping enough.

However, I don’t seem able to sick to plain coloured nails anymore; one colour won’t do. It is almost a disease.

So, I decided to try something new. I had wanted to play with tape for a while, but I can get quite lazy. This time I decided to go for it and create a chevron style.

I painted all nails using GoldenEye. Coverage is quite sheer at one coat, but it is good at two. I used three. The wide brush is always a winner here. The gold is amazing, deep, glittery, sparkly and with a coppery reflex to it. I painted in the morning and left it until the afternoon to do phase two.

I used normal household clear sticky tape, just cut a little strip and placed it from the upper corners of the nail  towards the centre, forming a “V”.  I then applied Barry M in Black to fill all “V’s” and removed them all carefully. I finished it off with a topcoat.

As a first attempt, I thought it turned out very well. A few of the lines were a little jagged, but not enough to look bad. One of the chevrons was slightly off centre (and that was on my right thumb nail, which has been recovering from an awful breakage and is much shorter than the others). Other than that, the chevron came out very good!

I will definitely try taping again, I loved the chevron look. The manicure was elegant, and duration was top – seven days, not a chip in sight; quite impressive for a black tip!

Rating:

Nails of the week – red and dotty

I needed a red manicure to go with a fancy dress costume – which is no effort, as it is my favourite nail colour –  but it had to be plain, which is a problem, as I get bored very quickly…

So I used the lovely OPI The spy who loved me, which I was really looking forward to trying,  and after I attended the party, I decided to give it dots in two colours: Colorama Ameixa and Ana Hickmann Jurerê. It looks very berry!

The OPI application was good, their wide brush really makes life easier; the polish is a bit sheer, but two coats are enough. Durability is great!

The dots were applied with dotting tools in 3 different sizes; as it is only the second time I do them, I think they came out pretty well – still have to nail the dots distribution though.

Both polishes used for dotting were up to the task; the colours were solid enough. I wish I had used a lighter plum colour for the darker dots, as most of the time they seem  black!

The only problem is that I added the dots four days after I did the manicure, so the cuticles in the pictures, which were taken six days after I did the basic red mani, are not looking perfect, there is a little bit of growth going on, unfortunately.

Still, I am pleased with this mani, and I shall be sporting more spotty nails in the future!

Rating:

Retrospective fashion show – from the past to the next season

Gold lamé – yes, please!

Bourne and Hollingsworth, the creators of Retrospective: The history behind next season, kindly sent me an invitation to attend the event. The fashion show idea is rather simple, but ingenious – to showcase coming trends using vintage pieces. As a big fan of vintage I was very excited to attend – especially was there was a party afterwards!

The show started with a display of fashion and silver screen icons and consisted of showing trends that we are currently wearing via garments from the past, from various eras.

The trends explored were Gothic (so hot right now!), monochrome, wild, lingerie/night gowns and the finale was a showcase of known designer pieces in mixed styles.

It is everywhere. Black, lace, crosses… and it was here too. From the gothic trend I really liked a Gil Y Jacques lurex dress with a feather choker and a 90’s Oscar de la Renta forest green silk shirt.

I love monochromes, to me, black and white together never go out of fashion… so that was a tough call… it will have to be the Biba black acetate and rayon jumpsuit and sequin jacket from the 70’s and a tulle and cotton white dress worn with patent snakeskin gloves.

Needless to say, I am a massive fan of animal prints, and in my books, a bit of leopard is always welcome, so wild is just up my street. Faves were an 80’s Adele Simpson snakeskin print silk dress and an amazing 60’s raccoon fur coat.

For the nighties, I didn’t fancy that enough to pick a piece, it’s ok, but not my favourite… but from their showcase finale, I have to say I enjoyed most of it… the Givenchy black viscose and lace jumpsuit (80’s) was fabulous, the 20’s silk and faux-fur dress coat so feminine, the glam Loriz Azzaro gold lame dress from the 50’s was possibly my favourite piece of all.

I really enjoyed the concept, it shows that not only the recyclable nature of trends, but also the clothes themselves they are still edgy and most still wearable.

As for the party, there were, as expected, music from different eras; and dance performances… it was a lot of fun. There were thematic cocktails (I had Gatsbys). Not fun was to wait ages for drinks, though…

Still, I enjoyed myself. Hats off to the stylist Violet Naylor-Leyland, who picked through pieces from various past times to present them neatly and excitingly – I am full of ideas. Inspiration, for me, is the main point of fashion.

Eye make up challenge: green, as a witch

Green witches (yes, Elphaba, I am talking about you!) inspired me for this challenge. I wanted to do something big, bold, a bit evil and of course, green. I love using green eyeshadow, it photographs really well, it is so vivid.

Here is what I did: I applied a primer, and attempted to erase half of my eyebrow (without much success). Then swept the whole lid with green pigment.

After that, using a darker green, I drew the cat-eye shape with a pencil brush, from the beginning of my crease to close to my eyebrow edge.

Then I applied a lighter darker green to the upper lash line and met the higher dark green line, closing the shape.  To add dimension, I applied very light green crushed pigment to the center of the eye lid, as a swoop that went from close to the inner corner, upwards, meeting the darker line at the top. I then blended all the lines using all the colours and some other shades of green until I was satisfied with the amount of definition of some lines and blending.

I lined the lower lash line with the lime green, closer to the inner corner, blending into dark green towards the outer corner and applied black eyeliner to the water line.

Finally, I added the lime green to the tops, a little bit of black to define some of the lines (close to the crease and from outer corner), applied black eyeliner, making a huge flick, and dabbed more light green crushed pigment close to  the brow bone and inner corner of the eye. I finished the look with false eye lashes.

Things that didn’t go too well:

1. I tried to “erase” the end of my eyebrow, it turns out mine are too dark and thick to do with concealer and foundation only. I did it in the past to re-create Boy George eye make up, but I suppose the person had fairer and thinner eyebrows than me, so it worked alright!

2. Drawing the shape was hard. Very hard. I had to clean everything up and start again.

3. My first combination of greens didn’t give me oomph. This is another reason I started again. Next time, I will swatch them in my hand before applying!

Products I used:

  • Urban Decay eyeshadows in Bender and Hijack
  • MAC eyeshadow in
  • Collection 2000 green pigment in Bitter
  • Ocean Scent green eye shadows from basic palette
  • MAC crushed pigment from Surf the Ocean pack
  • MAC Studio finish and Select Moisturecover concealers
  • Collection 2000 felt liner in Black
  • MAC eye kohl in Smolder
  • MAC brushes number 208, 217, 219, 239, 266 and 195
  • Urban Decay eye primer potion
  • DUO eyelash glue
  • Maybelline Falsies mascara
  • Eylure false eyelashed in Vintage 124

Difficulty:

Olympia Beauty Show 2012

Extreme nail art! Scroll down for more pictures

After registering as press to the Olympia Beauty Show and receiving my badge, I was delighted to finally attend the event on the 23 of September.

The exhibition is one of the “UK’s premier beauty trade events” and this year it took place at Olympia’s Grand Hall, in Kensington, London. Registration is free; but only open to therapists, salon and spa managers/owners, make up artists, hairdressers, nail technicians and beauty students.

I must mention that I was very impressed with the communications prior to the event; I received various emails with press releases, interview opportunities, and general information to enable me to make the most of my visit.

There was a media lounge and the social cloud, where attending press could talk directly to some exhibitors, swap cards, get some samples for review, as well as have a sit, have some coffee and water. There were also press releases from various companies and a few goody bags – always fun to see!

Nailed it!

This year, I have to say, it was all about nails; so many nail product stands! Gel manicures were really all the rage; lots of brands launching gel ranges, doing demos, massive queues of people wanting to have their nails done.

I am lucky to have healthy and strong natural nails, know to do my own manicures which are well finished and last in a great state for 7-10 days, so I am still a traditional nail polish gal. Plus, I get bored of the colours really easily. For all that, I haven’t bought into the shellac advantage, but I can totally see why people are going crazy for them – anything that promises busy women 14 days of nail peace is nothing short of a miracle! Even more established brands, are launching gel manicure ranges.

OPI, China Glaze, NuBAr, Minx and other big nail brands names were represented (OPI had a massive stand with own security, heaving with people!). I also met people from a cool polish brand and salon, Filthy Gorgeous, which have a line with striking colours. Their bottles come with a cute (and working!) plectrum. I was giving a lovely purple shade called Judy Baby and hope to try it soon!

Tantastic

Tan was also massive. Loads of stands offering spray tans to the exhibition attendees, in addition to selling the tools and materials of the trade. I have still to review self tanning products in the blog, so I am delighted I met Nicky from Sienna X, who offered me a sample version of a cute kit they are releasing for Christmas and also one of their gradual tans (really looking forward to trying this!), as well as a lovely bronzer I cannot wait to review, its texture is lush! They had a massive stand which was buzzing with professionals ordering for their salons – I was happy to see that, as Nicky was so lovely to me!

“The eyes have it”

Brows and lashes (fake and extensions) were well represented. Designer/stencil brow bars were everywhere, and the people responsible for the prettiest lashes ever, Paperself was also present – and doing a free application of their minis, so I left with the gorgeous Peacock (in love!). Have to say, I directed a good half a dozen people to their stand, as they asked me where my pretty lashes were from!

For the pros

Obviously, they were lots of stands with furniture e tools for salons and equipment for aesthetic face and body treatments, massages and alternative therapies.

Something I had never seen before were tanning tights. Yes, your heard it right- tanning tights. You wear them for 10 minutes, the tan transfers to your leg, afterwards, you can still wear them as normal tights!!!

Where is my make up?

The only think I missed were more make up stands. Really, I couldn’t spot many, I think I only spotted NYX and New CID!  Please more make up next year!!!

The exhibition also had four live stages, with presentations on the business of beauty, creative nails, make up art and medical beauty to give professionals an all round support on their business. There were competitions – artistic make up and nails, so I spotted some wonderful designs walking around! All buzzing, very organised, a great atmosphere.

My purchases weren’t as crazy as they could have been, seriously, so much temptation!!! I bought a couple of OPI polishes, three NuBar polishes, two Minx nails foils packets, a couple pots of glitter and crunched gold and silver foils for nails of course!

Overall, I had a fantastic time and would love to go back on the second day, sadly, I work all day, but I will certainly be going back next year.

Viviela London steps into London Fashion Week

Foot up!

I was delighted to receive an invitation to attend a show on which the gorgeous Viviela shoes were making an appearance – any excuse to see them in action!

After launching their first collection back in July, they bagged a London Fashion Week collaboration with MIMI.C. The demi-couture brand, which was founded in Lithuania and is currently based in London, chose three different models of their shoes (Piccadilly, City and Bromley) to strut their new collection down the catwalk at the Rose Club in Mayfair, London. It was great fun to sit with the partners at Viviela and find more about the brand and their lovely selves!

I do, once again, wish Vivi and Ela, the hearts and brains behind the heels, the best of luck with the shoes, and I hear they are working round the clock on their next collection – and I cannot wait to see what is coming up!

Read about the launch party in July and my views on the collection

See Viviela’s current collection

Nails of the week: purple with glitter flakes

Click to enlarge

Another thing I cannot have enough of is glitter flakes topcoats. They have this power of making any nail polish amazing. adding an extra dimension to any colour.

It is no secret I am a huge fan of duochromes and colour changing polishes in general, so no surprise I fell head over heels for the amazing flakies from Brazilian brand Specialittá.

I really like them, they do really different colours and effects lines. I placed an order online and got a friend to bring it over to London for me… I must have bought a good 10 bottles, so watch this space!!!

This week, I am wearing Collection 2000 Purple rain with Specialittá Hits Fox Trot over it. Fox Trot is part of their Mundo de Danças (World of Dances) collection which has lots of glitter flakes polishes.  This one has a jelly-ish purple/mauve base and is laden with pretty flakes, which change colour from pink, reds and golds to pale green. The colours are quite subtle but really pretty, and the change can be seen on many different types of light! Gorgeous!

Application was smooth,I used two coats of each polish (as I like plenty of flakes!!!) plus the topcoat, and durability is fantastic.

Pretty overall; very happy with it!

Other polishes from the collection will be coming soon; I bought three from their 12!

Any amazing flakies out there for me to go crazy about? Would love to expand my collection!

Rating: