Nails of the week: blue and green glitter flakes

Flakies!!! My obsession is truly at full steam after I got back from Brazil with a suitcase full of flakie polishes!

This week, I tried this green and blue shifting glitter flakes polish, from a brand I didn’t know before – Sancion Angel. This is from their Jóias do Nilo collection and is called Cipreste. It is well saturated of flakes and they have  great shifting – looks really pretty! I applied two coats over two coats of Colorama Black, a pure shiny, well, you guessed, black!

Blue and green glitter flakes nails - somanylovelythings

Application was easy and durability was great. I am glad I liked the brand, as I have other four flakies to try! Cannot wait!

Rating:

4_star

Nails of the week – metallic green, blue, mauve marble

I told you I was going to have marbling done on my nails again…

This time, I went for a lighter base, Close, a metallic greenish aqua with some gold hints, then my lovely manicurist in Brazil, Irma, added Dancer, the metallic dark blue and Gaia, the metallic mauve, all from Brazilian brand Naty.

green, blue, mauve marble nails

She used the same technique as before (see my previous post), with the wooden stick, and the patterns are really lovely!

I then got my toe nails painted with Gaia – I love it!

Durability was great, and in a few weeks I will try it myself…

nails and toenails, nail polish bottles - somanylovelythings

Rating:

5_star

Nails of the week: purple, blue and pink marbling

marble nails - so many lovely things
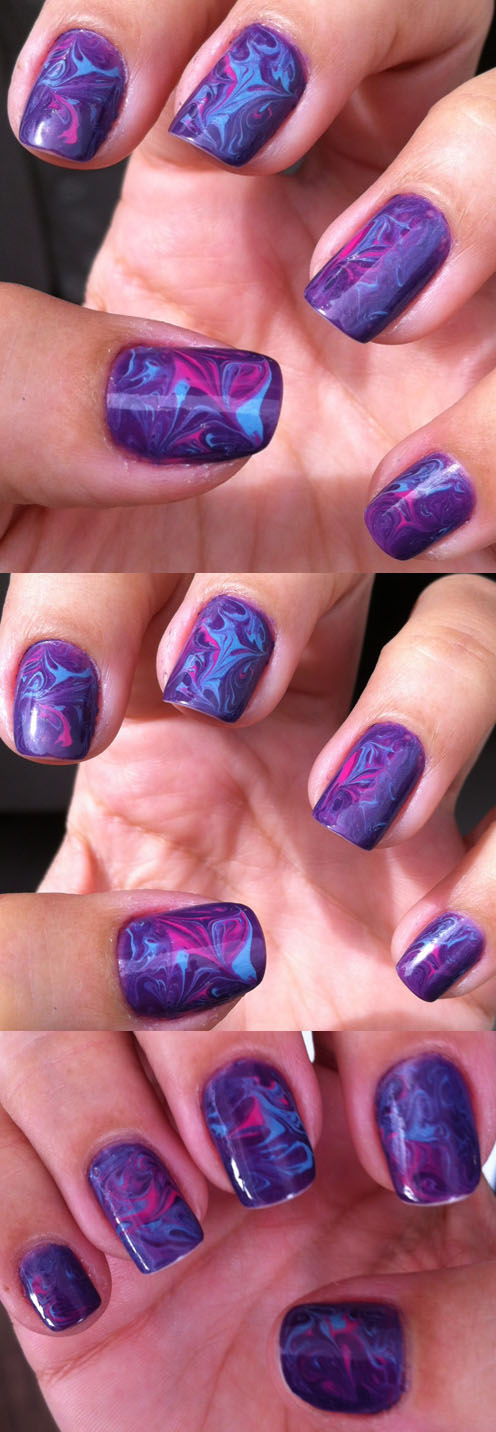
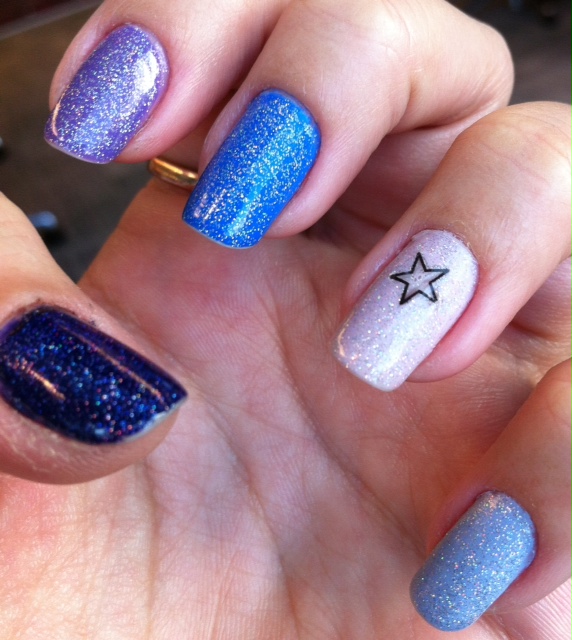
I will confess straight away. I did not do this myself. This is one of the few manis posted here I haven’t. When I am in Brazil, I always go to the same manicurist. She, however,  doesn’t tend to do anything artsy, as her clientele base usually goes for basic colours.

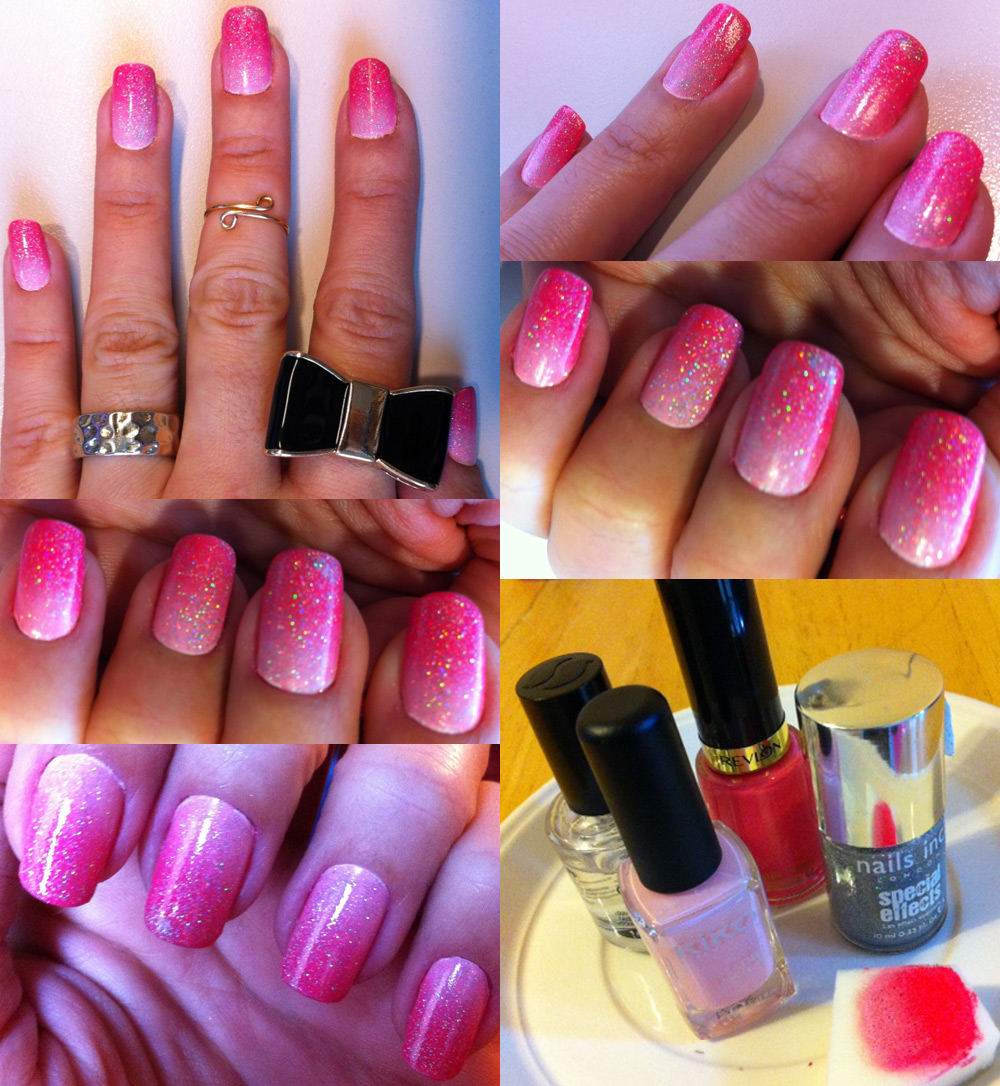
After insisting a bit, she told me  she could do the marbling but not with water (“That takes too much time, especially to clean!” Irma said), but mentioned she could do something similar with a stick. Of course, I said yes.

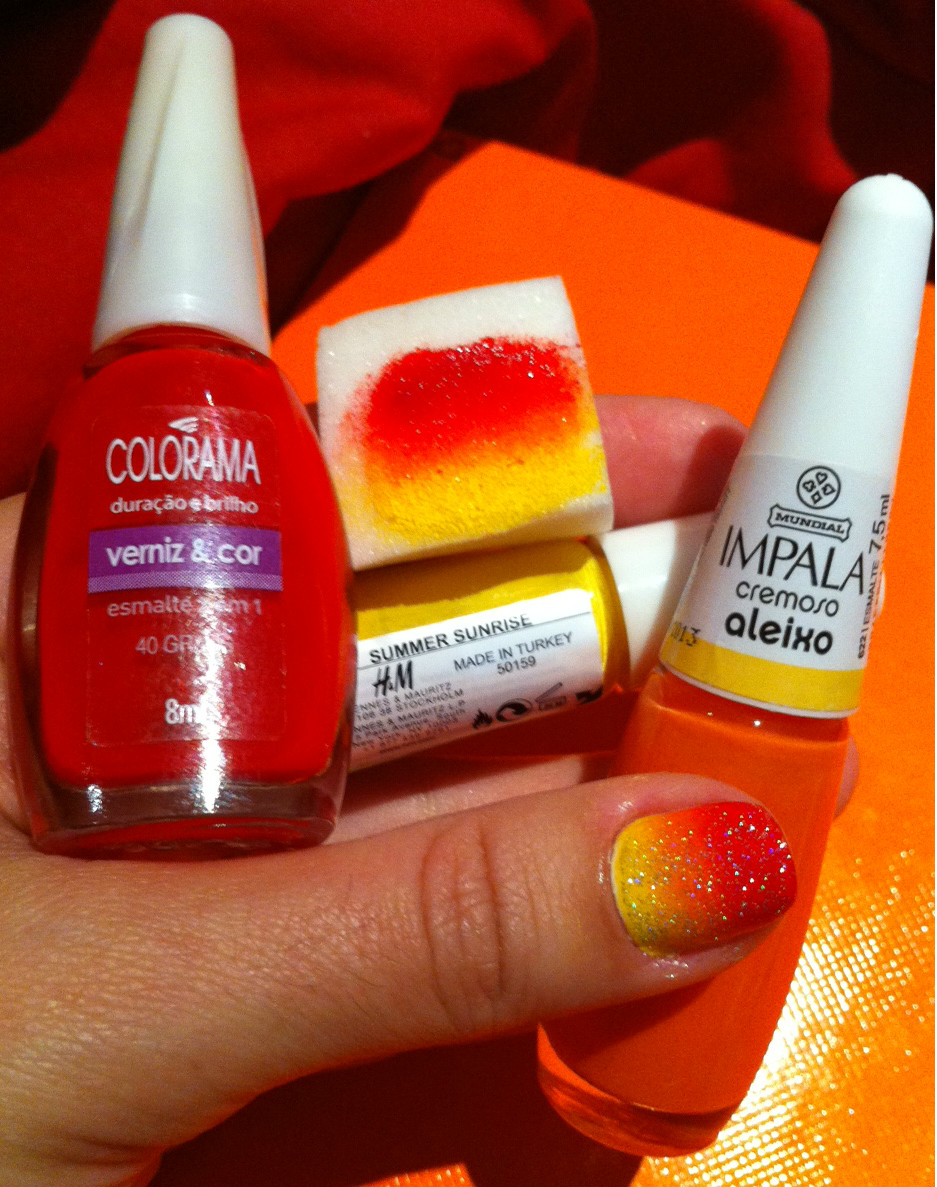
Now, my second confession: I forgot to take down the name or photograph the nail polish colours used. Do-oh.

Basically, she applied purple first and made sure some areas were very saturated with polish. The she generously blobbed pink and blue around the nail and using a wooden stick, mixed the colours in random motions – big circles, tiny ones, waves…. to create the patterns. The secret is not to “stir” too much otherwise the colours will blend. Also, careful not to leave gaps without polish as you “scratch” the nails with the stick!

And this is the result. I really like it. It is different, very detailed and each nail is completely unique! As you can see, my nails are well on their way to recovery since the moving disaster. Yay!

It lasted well – a whole week, no chips, with an ordinary topcoat – I didn’t use Seche Vite there.

I loved this mani so much that have another one on… which will be published next week – and with the names of the nail polishes used!

Rating

5_star

Nails of the week: warm colour gradient

Yes, I am still obsessed by gradients. I just love them. So, I gave myself another one: a lovely yellow, orange and red, to go with my tropical mood, as I am on holidays in Brazil (hence the lack of posts).

nails_gradient.jpg

I used the H&M bright yellow summer sunrise, Impala’s orange aleixo and one of my fave reds ever, Colorama’s 40 graus. I used the sponging technique and applied the gorgeous Nails Inc electric lane topcoat. Ended up with a good seven layers and a lovely heart nail tattoo on my ring finger, from SkinArt UK to finish off the design!

It lasted very well – eight days including pool days!

This mani lifted my spirits, it is cheerful and looks forward to the summer!

gradient2.jpg

Rating:

5_star

Nails of the week – colour shifting glitter flakes

glitter flakes nails - somanylovelythingsYet another glitter flakie, from Sephora this time. I keep buying them and they are ever so similar, but I cannot help it!!!

This is called Purple Jewel and I do regret not having applied over purple, to see how it would come out.

I applied over black and this polish is laden with flakes, really saturated. With two coats, I barely had any space without flakes on my nails.

The colour shifting is amazing, from green to yellow, orange and fiery red. Really pretty.

It is however, very similar to flakies I posted before, namely Ana Hickmann Glow and Specialittá Hits Cha Cha Cha, which cost me a fraction of the €5,90 of this one.

Still, I really like it, as I mentioned before, it is way more saturated in flakes that the two mentioned above and I think three coats would probably cover the whole nail, creating an almost metal effect. Maybe next time….

Durability was good, but it shrunk an awful lot when I applied the topcoat!

Rating:

4_star

Nails of the week: blue matte glitter

nails_opi_liquid_sand2You probably guessed, I am talking about OPI’s liquid sand. I got myself a set of minis to try them all!

The first one was the lovely blue “Get your number”. It is a lovely indigo blue glitter with some holographic glitter in it, so really laden with sparkle.

It applied ok, I missed the wide brush from the full size version… the little one is mega fiddle and the opening of the bottle tiny!!! It really needed three coats and I am not sure if this is because of the matte formula, but it took a long time to dry and it was a bit gloopy. It also took a while to go matte, which is not a problem – it kinda developed in my hands!

Durability was ok, as it is quite rough and it won’t take a topcoat, towards the 6th day it started to chip at the edge, more like glitter flakes coming off and leaving gaps.

Now… I quite like it. It is different. The texture gets to me a little bit. It is rough. Also, it is such a sparkling polish, amazing colours, holographic bits, but it all gets a muted somehow when it goes matte. I say glitter should ALWAYS sparkle, and although there was plenty of pretty shiny flecks,  that was lacking a little bit.

nails with opi liquid sand - somanylovelythings

Apologies for the rubbish pics, it was another week I was too busy and took just a few quick snaps!

Rating:

3_star

Nails of the week: red and black

Red and black nailsIt is no secret that I LOVE red and black, so I decided to, yet again, use that on my nails.

I used two coats of the red OPI The spy who loved me, reviewed here in the past, and two coats of Brazilian brand Risqué’s Viúva Negra (black widow), a lovely black jelly base with fine red glitter and went for a chevron design, alternating the colour on my ring finger to create an accent nail.

Application was great for the OPI and ok for the Risqué one – it is quite sheer, so it was hard to make the chevrons in one coat, had to use two, which made them a little blobby. I used normal sticky tape for the chevrons, like last time, with black and gold. Durability was good, 6 days, and then a chip.

Overall, I was pleased with the mani; it was slightly untidy, the chevrons could’ve been sharper – and so could my pictures – apologies, as the last month was crazy and I forgot to photograph properly!

Rating:

4_star

Nails of the week – blues and purples

blues and purples nails - somanylovelythings It had been quite sometime since I painted each nail one different colour, and I was certainly in the mood for this week.

I decided to go for blues and purples – I love purples on my nails, and one of the blues I used is one of my favourite nail colours ever!

I used Nails Inc Oxford (light blue), Nails Inc Cambridge (light lilac), Kiko 336 (royal blue), H&M Pale violet (purple) and Nails Inc Belgrave Place (darkest blue) and added the super pretty Nails Inc topcoat Electric Lane (another obsession of mine – so versatile and so pretty, a great investment , finishing it off with a cute star nail tattoo!

Really love the look! Application was smooth and easy, and durability is ace – 8 days, no chips.

blues and purples nails - somanylovelythings

Rating:

4_star

Nails of the week: nude and red

red and nude nails - somanylovelythingsThis week I went again with a combination I love: discreet nude and vibrant red.

Originally, I wanted to do a nude half moon manicure , with red on top, but that didn’t go that well for me; somehow the half moons were too big, looking more like full moons and I wasn’t happy with it. At all.

So I got my dotting tools out and added some red dots… it looked ok but still not great, so I added some nude dots in between and ended up with this kind of dripping mani. I didn’t like it a lot, but it grew on me; the fact it is impeccable after 8 days helped me like it more.

So I started painting the whole nail with the Nails Inc nude Basil street and the applied Colorama’s 40 Graus over it, leaving the (ginormous) moon. Using the dotting tool, I added red dots close to the half moon line and then added the nude ones, intercalated.

Had I thought I was going to end up with a dripping mani, I would’ve Kenmore precise – I just went adding dots randomly… It didn’t end up too well, but I don’t hate it!

Rating:

3_star

Nails of the week – pink gradient

pink gradient nails - somanylovelythingsOh, how I love a good gradient. Relatively simple to do (it just requires a bit of patience!), gradients deliver great “value for money”. It is pretty, different and can be done with the cheapest, plainer nail polishes around. Love it.

I am totally in love with this weeks mani – it is girly and sparkly, totally gorgeous (even if I say so myself!)

I used a light pink from Kiko, number 376 candy pink, and a dark pink from Revlon, sweet tart. As usual for my gradient, I painted all nails plain white (Natural Collection nail tip whitener) and sponged the pinks after it was dry.

To finish it off, I applied one coat of the super gorgeous electric lane from Nails Inc, which gave it sparkles and an extra dimension with its holographic goodness.

Application was a bit long. I did the white base, let it dry for most of the day and sponged in the afternoon on a Sunday, it took three rounds of sponging. All together, counting base coats and top coats, I have eight (yes, you read it right!) EIGHT coats of nail polish on! However, durability is ace: I’m on the 8th day, no chips! What annoyed me this time is that there was an awful lot of excess polish under my nails and that was a pain to remove… Having said that, it was well worth it!

pink gradient nails - somanylovelythings

You will certainly see more gradients coming soon… watch this space!

Rating:

5_star