So Many Lovely Things beauty retrospective 2015: makeup

beauty_retrospective_somanylovelythings2015. What a fabulous year for the blog. I never expected all the amazing things that happened, brands, products and, above all, people I met.

Just amazing; I feel grateful and privileged.

Among so many great products I tried this year, it is very hard to pick my favourites, but here it comes. Without further ado, the best makeup of the year goes to:

Overall highlights:

Black lipstick

If you asked me, I’d have never in my life said I’d wear black lippy outside fancy dress. During the day? Oh no. But I did, and I freaking loved it.

It did something to my face, almost softening all of my other features. Did I mention I love it?

MDMFlow Di La La is THE black lippy to have.

charlotte_tilbury_makeup_john_lewis - 2Charlotte Tilbury

After resisting that all important first purchase as I did find the makeup was on the pricey side, I succumbed after trying a few fabulous items John Lewis sent to me.  Since then, I’ve added seven extra items to my CT collection.

Massive big up to the Colour Chameleon Eyeshadow Pencil and even more to the Fat Lashes mascara, which is indeed a miracle worker (review coming very soon).

Foundation, lipsticks, eye pencil, lip pencil, brow pencil, eyeshadows… everything is fabulous.

Lipstick

rouge_louboutin_velvet_matte_lipstick - 2Louboutin Rouge Velvet Matte Lipstick: beautiful inside out. I don’t think  have to talk much about this one. Too pretty to miss.

charlotte_tilbury_makeup_john_lewis - 1 (1)Charlotte Tilbury K.I.S.S.I.N.G Love bite lipstick: usually a finish I don’t go for, a kind of lustre, but oh, boy, this is pretty. An orange red, with a fab sheen, but not too much, and great durability.

Foundation

hourglass immaculate foundation reviewHourglass Immaculate: replaced my long standing foundation and proved its price tag. One downside is the lack of SPF in this product. so close to perfection…

Charlotte Tilbury Magic Foundation: not replacing the one above but worth of mention. Nothing I try for Tilbury is less than great. Together with my faithful MAC Studio Fix, makes for a cheaper everyday alternative to the pricey Hourglass.

Highlighter

hourglass_ambient_lighting_edit_palette_review - 4Hourglass Ambient Lighting Edit Palette: all the highlighting you will need, plus blushers and a bronzer. Just perfect.

thebalm_maryloumanizer_highlighter_review - 4The Balm Mary-Lou Manizer: the shade on this highlighter is just great. Not too gold, not too yellow, and its a fab multitasking – looks great on eyes.

inika highlighterInika Light Reflect Highlighting Creme: a fabulous product which delivers a great glow. Plus it’s vegan, organic and halal.

makeup revolution vivid baked highlighterAnd a special mention to my favourite budget highlighter: Makeup Revolution Vivid Baked Highlighter in Peach Lights. A bit 2014 but still going strong.

Primer

hourglass veil mineral primer review
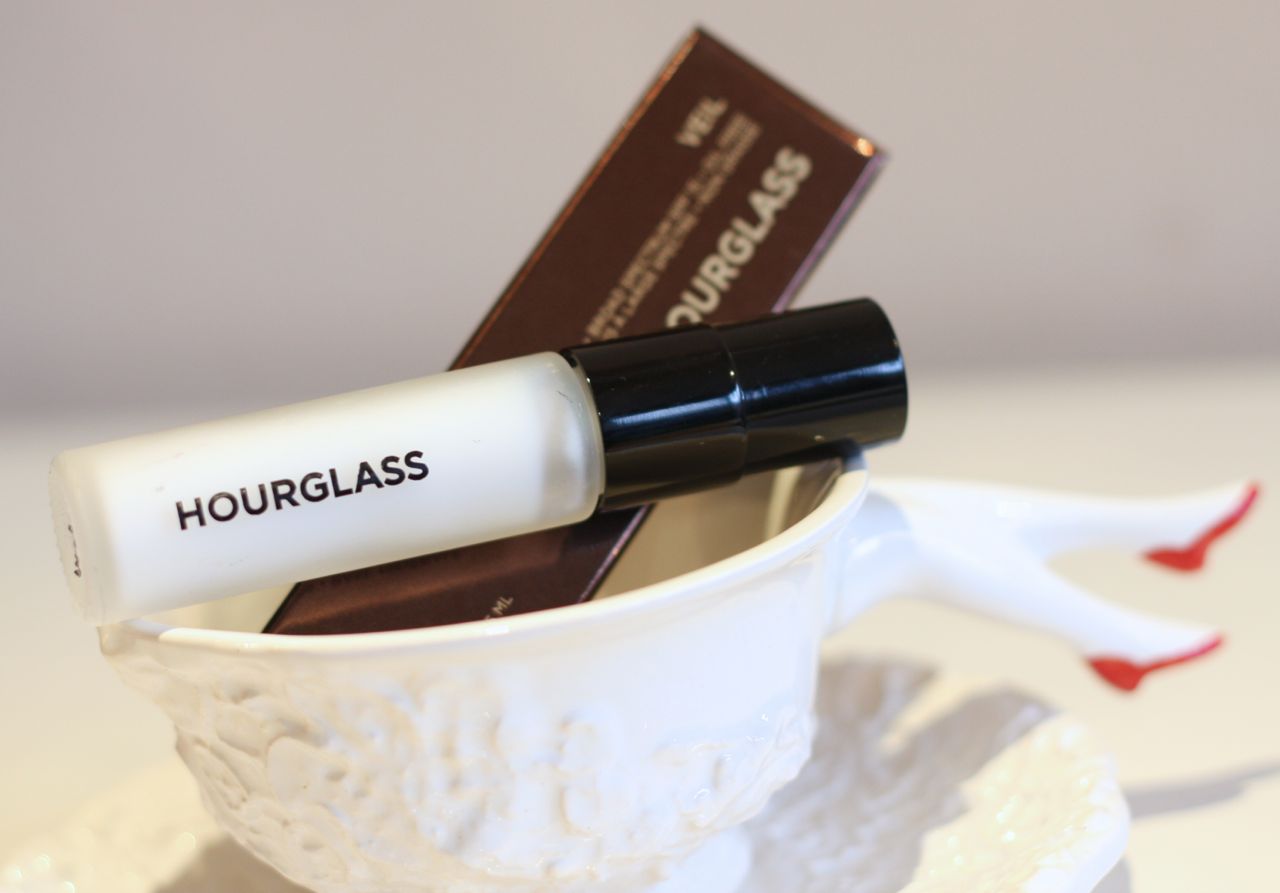
Hourglass Veil Primer: reigned absolute this year. No contenders to this product; it fill all the expectations from a primer – it smooths, aids product distribution and duration, as well as making makeup sweat proof.

Eyeliner

nyx_twotimer - 3NYX Two Timer: a great, precise, easy-to-use product with fabulous pigmentation and durability. Plus a friendly price tag.

gosh xtreme gel liquid eyelinerGOSH Xtreme Liquid Gel eyeliner: the finish on this product is superb, think vinyl, with incomparable shine. And it’s immovable.

Urban Decay Ink for Eyes: a tiny tiny pen with extra fine nib for precision lining. Very neat.

Eyeshadow

charlotte_tilbury_colour_chameleon_review - 1Charlotte Tilbury Colour Chameleon Eyeshadow Pencil: easy to use, great durability, fab colours. Enough said.

Urban Decay Naked 2: yes, you read it right. 2. Even with the Smoky buzz this year, which I succumbed to, that old palette remains my favourite and is used daily.

Mascara

Charlotte Tilbury Full Fat Lashes Mascara: Definition and separation: check. Non-clumpy formula: check. Longer lashes: check. Natural volume: check. Perfect.

nyx doll eye mascara reviewNYX Doll Eye Long Lash Mascara: definition, fan-effect and a pocket-friendly price tag.

Benefit They’re Real Eyelash Primer: what a surprise I got with this product. Separation, fanning, conditioning and a flattering brown tint that makes it wearable on its own.

Tinted products

La Roche-Posay Effaclar BB Blur: what a great surprise this was. Its mousse consistency delivers a surprisingly good durable coverage and caters for blemish prone skin. Win. Launches early 2016.

caudalie2Caudalie Vinoperfect Radiance Tinted Moisturiser: good, radiant coverage, full of grape goodness and a handy SPF 20.

I am sure I missed some loved ones, but these are for sure, my beauty highlights.

What product was your favourite in 2015?

signature1

This post mentions some press samples.


Shine and shade with the gorgeous Hourglass Ambient Lighting Edit palette

hourglass_ambient_lighting_edit_palette_review - 1Can Hourglass do anything wrong? From what I can gather, the answer is no. I am flooded with fear every time I approach the counter as I know I am about to part with a great chunk of money.

With the Ambient Lighting Edit palette is no different. In fact I knew it wouldn’t as last time they brought out an ambient lighting trio, I was very close to buying it.

This one has six amazing products – a powder, two highlighters, two blushes and a bronzer.

The powder, called iridescent Strobe Light and is new to the brand, gives that airbrushed effect, it’s almost translucent for my skin tone, with a glow sheen to set and tune skin to perfection.

I have to admit that this is only good for me when my problem skin is having a good day as it doesn’t conceal much.
hourglass_ambient_lighting_edit_palette_review - 4The highlighters are beautiful; a subtle, non-glittery shine that catches and reflects the light beautifully.

Dim Light has a peach undertone to blur and highlight and Diffused Light is pale yellow, or white-golden to boos clarity and conceal redness.

Both work very well. hey are so subtle that you will only realise they are hard at work when the light catch it. Beautiful and long lasting too.

hourglass_ambient_lighting_edit_palette_review - 3The blushers are marvellous. Mood Exposure has a soft plum tone and is fused with Mood Light powder, for extra brightening. I didn’t think would go with my skin, but it’s my favourite.

Luminous Flush is a champagne rose shade combined with Luminous Light powder, to add a candlelit glow.

The fact they are marbled with some of the powders created a gorgeous colour which is subtle, multi-dimension and multi-tasking. They are very pigmented, extremely blendable and complimentary to the highlighting powders.

The bronzer, Luminous Bronze Light, was my biggest surprise. A medium tan shde is fused with Luminous Light, for a very soft and warm glow.

hourglass_ambient_lighting_edit_palette_review - 6It is subtly glittery, it has good pigmentation (a little goes a long way!), applies well and makes for a decent light contour.

Every single product in this palette is very wearable. The compact is gorgeous and a pleasure to whip out of the makeup bag, although not that small. It is great for a day to night transformation or touch ups in the day. Hourglass says the colours are complimentary to all skin tones.

The deal breaker with the Ambient Lighting products is their Photoluminescence Technology, which filters out harsh light and refine the appearance, as if the skin is glowing from within and not the surface. Hourglass products are free from parabens, talc, fragrance, nanoparticles and gluten.

  Is it with the £65 price tag? If it’s within your budget, definitely yes. I thought I was going to regret. Well, I didn’t, especially when I picked it up at the beautiful Liberty London.

signature1

Primed and prepped: a guide to primers

which_primer - 2 of 6 (1)Many a times I went on about how primers changed my life and how important they are in the makeup routine. I will give you a brief round-up not to bore you.

Continue reading

My hero products of 2014

2014faves

Retrospective. Most of the times, not a good thing (as we tend to do it when something didn’t go right) but in this case, a rather fab one as I am looking back at my life-saver products of 2014.

Continue reading

My halloween look: Disney’s Maleficent

Maleficent Halloween look - somanylovelythings

It is no secret I absolutely LOVE dressing up. Halloween is just another opportunity for me to get drawing, cutting, sewing and hot gun gluing.

Maleficent is my favourite Disney character. It has always been, since my mum bought me the Sleeping Beauty book from the book circle people (it was so long ago, they used to come to your door, hahahahaha) and then later on, the VHS, which I watched repeatedly, as any good child obsessed with their favourite story. However, even though I love Aurora, Maleficent was for me, the highlight of the story and even though she deserved to die (as these stories go), I just loved watching her turn into a huge, scary dragon.

Maleficent Halloween look - somanylovelythings

So this year, I decided to turn into the Mistress of All Evil. I interpreted her three times when younger at school, and although I perfected the evil cackle after the “prick her finger on the spindle of a spinning wheel and die” line, my costume making and makeup resources and abilities weren’t even close to what they are today.

With high expectations, I started to gather the bits: a cheap vampire cloak, twisted devil horns, an amazing raven (or crow, not quite sure!) and purple satin from eBay. I painted the horns black (with acrylic paint from Tiger, they originally had some red in them) and using a hot glue gun, attached them to a wide alice band. I wrapped a satin ribbon around the joints and headband to give it a better finish.

Maleficent Halloween look - somanylovelythings

For the sceptre, I bought a cheap devils trident and a tacky oversized Christmas bauble, which was red. I removed the colour with nail polish remover to rveal the silver and glued (hot glue) to the trident stick. I then hot glued my raven on to it.

I then cut the sizes of the cloak, added a lining layer of purple to the back and added the shredded purple details to the from opening. Underneath, I wore a New Look black velvelt bodycon, tights and black court shoes.

Maleficent Halloween look - somanylovelythings

For the make up, I created my usual base with Hourglass Veil primer, MAC Fortified skin enhancer in adjust, foundation, concealer and powder. I then started the eyes. I used Urban Decay purple Vice and MAC Bitter for the eyes, as well as Eyeko Skinny liner and Black Magic mascara and a set of exaggerated, cheap false lashes.

I painted my raised eyebrows and my widow’s peak with MAC gel liner in Blacktrack. I then applied eyeshadow Bitter all over my face, to exhaustion, until I became green-ish and contoured the cheeks quite blatantly with MAC’s Carbon eyeshadow and my usual contouring shade from Inglot (a muted almost grey brown).

I finished off with MAC’s Russian Red and a huge black ring.

And as a bonus, here is a pic of my better half Frankenstein monster, which I put together pretty quickly! Make up took five minutes with green face paint, MAC gel liner in Blacktrack and Carbon eyeshadow. Bolts were made of grey foam, painted unevenly with Barry M Foil effect polish and glued on with Duo lash glue.

frankenstein halloween look - somanylovelythings

I think I looked quite scary. I was very pleased with my Maleficent – I was so worried I wouldn’t make her justice, but in the end, I think I pulled it off!

What did you dress up as for Halloween this year?

Eye make-up look challenge: peacock eyes

blue, purple and green eye make - somanylovelythingsThere is no secret that white, red and black are my favourite colours, preferably together. However, the colour combination on a peacock really fascinates me. Actually, I would go as far as saying it mesmerises me. The greens, blues and purples, with the hint of gold and extreme shimmer is just too beautiful.

For that reason, I went for a peacock inspired look, topped with a super cute set of lashes called peacock in the outer corner of the eyes.

Here is how I did it:

After priming my eyes, with a shadow brush I swept the blue crushed pigment in the inner corner of my eye towards the middle. I then applied the purple colour and blended with the smoking from the middle towards the end. Finally, I added the green to the outer corner, also with the smoking brush creating a cat eye shape with the pencil brush and also to the crease, blending well towards the purple. I really saturated the colour, re-applying and blending again.

Then I applied, with a liner brush, the eyeshadows to the lower lash line, first blue, then purple and green, from the inner to the outer corner.

Last, I added the liquid liner in metallic purple, creating a flick at the inner and outer corners of the eyes, and adding four dots above the end.

I finished it off with a set of false lashes and then, on top of them, the extra pretty Paperself laser cut lashes in peacock, of course and a bit of highlighter and sparkle to the brow bone.

I really like this look. It took me a while to achieve it but it was well worth it.

Products I used:

  • myface.cosmetics blingtone eyeshadow in purple haze and crystalline green (they are amazing, the shimmer in them is superb!)
  • MAC crushed pigment in winter sky
  • MAC pigment in Vanilla
  • Kryolan glamour sparks in golden
  • Hourglass Film Noir mascara in onyx
  • Duo eyelash glue
  • myface.cosmetics liquid eyeliner in sugar plum
  • set of eye lashes I don’t know where I got from
  • Set of Paperself eyelashes in peacock design
  • MAC brushes 217, 219, 231 and 130

tools and products used to create peacock eyes by somanylovelythings

Difficulty

eye make up look  - hard

Product review: Hourglass Film Noir mascara

Hourglass film noir mascara

I bought the Film Noir full spectrum mascara in Onyx, from Hourglass, after getting a sample with an amazing load of products I got for free at Liberty after spending a certain amount of money on beauty.

It caught me in a time I was quite unhappy with the mascaras I had been using. Somehow my all time favourite Maybelline falsies wasn’t agreeing with my lashes and they seemed clumpy and messy. I bought a Dior mascara and that was horrible – clumpy to the max!

So I decided  to give this a go. After using the sample for a while, I noticed that this mascara gave good lashes separation, length and volume. I hadn’t heard of Hourglass before, and their prices are quite steep (£25 for the mascara) and that was the reason I didn’t buy straight away. What a fool, I could’ve been happier before!

Hourglass film noir mascara

The brush seems have twisted bristles in an hourglass shape. I really like that it doesn’t dry the lashes. If you need to re-apply later in the day, it is not that dry rubbing, that just seems to clump more and more, as the new coat cannot stick to the lashes. It applies softly, almost as if an extra coat when you applied for the first time.

Durability is great, in fact, it is very stubborn and although it is not waterproof, it needs an oil based eye make up remover to come off completely and easily. A normal one requires a couple goes at least.

hourgalss mascara on eye - somanylovelythings

This is what they say on their site:

“A sensational all-round mascara with dramatic, cinematic results: Film Noir volumizes, lengthens, separates, and conditions lashes all at once. The signature hourglass-shaped brush is designed for optimal application, while the intense concentration of Panthenol (ProVitamin B5) generates a reflective, jet-black sheen.

• Signature “pinwheel” bristles of the brush volumize, lengthen, separate and condition lashes for low-maintenance application with high-impact results
• Pro-vitamin B5 hydrates and conditions lashes to keep them supple and healthy-looking
• Added polymers help formula adhere to lashes and resist smudging and fading
• Triple-cut hourglass-shaped brush evenly distributes product to create volume while lifting and lengthening
• Free of phthalate, sulfates, synthetic dyes and gluten”

I really cannot disagree from their description, really. I am chuffed with the purchase. I returned to the brand counter at Liberty since buying this one to buy their Veil primer which is great – will review at some point!!! And they always give you samples! If you have a Regent Street Association card, you get 10% off at Liberty, including Hourglass!

Eye make-up look challenge: festive gold

Festive gold eye make-upOooh the festive mood… it is in the air… everywhere you look… Here, at So Many Lovely Things it’s no different. Nothing better than a lovely black and gold smokey eye to go with it, right?

I started by applying the gold eyeshadow across the whole lid. I then applied the black with gold flecks to the crease and swept out and upwards, following a 45 degree “line” from the outer corner of my eyes.

I then applied black eyeliner on the upper lash line, with a nice flick, followed by a gorgeous metallic eyeliner above it, creating a slightly longer flick.

I then applied black eyeshadow to line the lower waterline and lash line, and applied the gold eyeliner slightly below the lash line, creating another flick at the end, in the same direction of the upper lashline.

I then applied a light eyeshadow to highlight the brow bone and sprinkled the gold dust around the brow bone and towards the inner corner of the eye, and finished off with some mascara and gorgeous false lashes.

Great for New Years eve!!!

Products I used:

  • Urban Decays eyeshadows in zephyr (book of shadows IV), jagged and blitz (vice)
  •  Collection 2000 felt tip pen liner
  • myface.cosmetics liquid eyeliner in gil-ty
  • MAC eyeshadow in carbon
  • Mac Zoomlash mascara
  • Kryolan glamour sparks in golden
  • Eylure eyelashes in vintage 124 (if you look really closely you’ll notice they are not perfectly applied – had one of those nightmare days where the lash doesn’t want to sit in properly, unluckily  it was on my “model” eye… oh well)
  • Beauty boxes brushes (first time I used them – they are great!)

20121221-141038.jpg

Difficulty:

eye make up look - medium

Eye make-up look challenge: red and orange

Tropical cocktail. This was my inspiration for this look, so I am naming it Tequila Sunrise, taken from the drink, of course, but also from the liquid liner name!

I primed my eyes and applied a shimmery golden peach shade on my brow bone, blending towards the crease. I then swept the orange all across my lid and blended upwards. Using a blending brush, I applied the raspberry on the outer corner and blended around the crease.

I then applied the black liner, creating a long-ish flick on the outer corner. I then used the liquid eyeliner in metallic orange/copper above the black eyeliner and then from the outer corner of my eye, just below the black, following the same shape. Black eye shadow was applied across the water line using a liner brush, then I applied black eyeliner to the lash line, smoking it just a little bit.

After that, I cleaned the fall-offs and applied a concealer under my eyes. I then created the line below my eye, from the inner corner, following the black liner just past half the eye and flicked downwards.

I made the raspberry colour more intense using the pencil brush on the crease and applied the shimmery peach to the inner corner of my eye, bringing it up slightly on the inside of my nose bridge towards my eyebrow.

To finish it off, I applied mascara and then false lashes. Very happy with this look,  it is different, colourful and very pretty!

Products I used:

  • myface.cosmetics silkscreen eyeshadow duo in siren
  • Inglot eye shadow 469
  • MAC eyeshadow in carbon
  • myface.cosmetics slinky liquid liner in Tequila Sunrise
  • Urban Decay eyeshadow primer potion
  • Laura Mercier eye concealer in wheat
  • Hourglass film noir mascara in onyx
  • MAC eye kohl in smolder
  • Collection 2000 Extreme felt tip eye liner
  • MAC make up brushes 239, 217, 219, 231, 194 and Mink blending brush

Difficulty: